
Tools
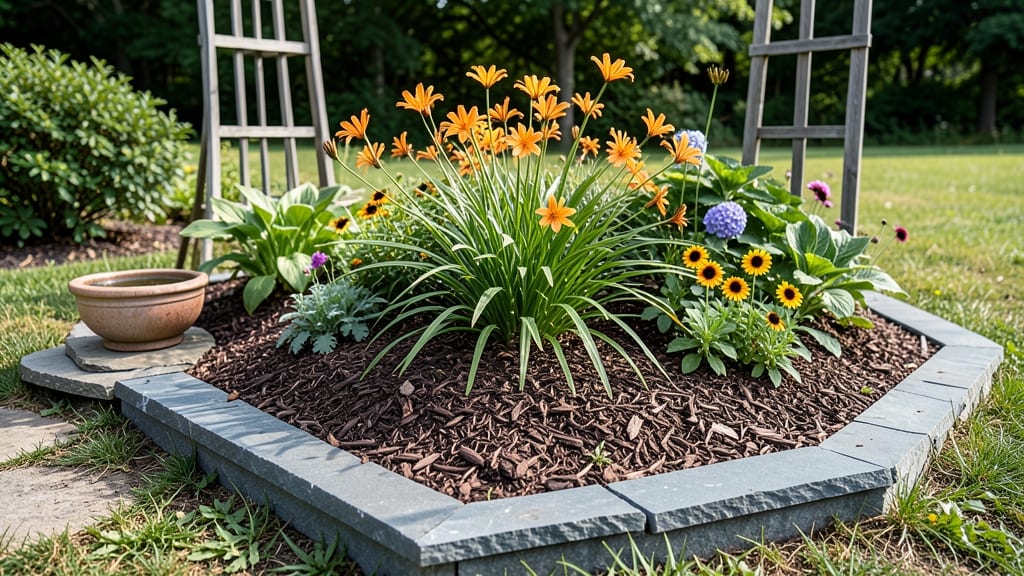
Creating mound garden bed ideas that maximize space and boost yields is easier than you think—especially when you use elevated soil to warm roots, improve drainage, and cut down on bending.
Picture this: a small yard transformed into a thriving garden without the backache of digging trenches. Mound beds let you grow more in less space, whether you’re working with a slope, a corner, or just limited square footage.
The best part? They’re perfect for drought-resistant plants, climbing vines, and even delicate ornamentals that hate soggy soil.
From circular designs to tiered spirals, these space-saving layouts adapt to any yard—urban, suburban, or rural. You’ll learn how to build them with the right soil mix, choose plants that thrive in elevated beds, and keep pests at bay while making maintenance a breeze.
Ready to raise your garden game? I’ll walk you through five proven layouts, step-by-step soil prep, and the top plants to grow—so you can start harvesting sooner and with less effort.
5 Space-saving mound garden bed layouts for small yards
If you're working with limited space but want a thriving garden, mound garden beds are the perfect solution. These elevated designs improve drainage, reduce weeds, and make planting easier—especially for those with back issues.
The best part? They fit seamlessly into urban balconies, sloped yards, or tight corners while boosting your harvest. Below, I’ll share my top 5 layouts, each tailored for different spaces and gardening goals.
Mound beds also warm up faster in spring, giving you an earlier growing season and protecting roots from frost. Plus, their elevated design keeps pests like slugs and snails at bay.
Whether you’re growing vegetables, herbs, or flowers, these layouts maximize every inch of your yard without sacrificing beauty or productivity.
| Layout | Best For | Depth | Materials | Planting Tips |
|---|---|---|---|---|
| Circular Mound | Small patios, focal points | 12-18 inches | Cedar logs, landscape fabric, topsoil | Plant tall flowers in center, shorter plants around edges |
| Tiered Spiral | Sloped yards, vertical growth | 10-24 inches (gradual rise) | Stone borders, compost, coconut coir | Use climbing plants like beans or cucumbers |
| Rectangular Raised Mound | Corner spaces, edible gardens | 18-24 inches | Bricks, hardware cloth, peat moss | Layer soil with sand for heavy clay areas |
| Keyhole Shape | Compost-rich gardens, permaculture | 12-18 inches (center deeper) | Stones, straw, leaf mold | Add compost in center for nutrient boost |
| Corner Layout | Tight spaces, urban gardens | 10-16 inches | Wooden planks, landscape fabric | Use dwarf varieties for compact growth |
Let’s start with the circular mound, which is ideal for small patios or as a stunning garden centerpiece. This design mimics natural hillside gardens but in a contained, manageable form.
To build it, use cedar logs or bricks to create a circular base, then layer landscape fabric to prevent weeds. Fill with a mix of topsoil, compost, and perlite for optimal drainage.
Plant taller ornamental grasses or sunflowers in the center, with shorter herbs like thyme or marigolds around the edges.
For sloped yards, a tiered spiral mound is a game-changer. This layout follows the natural grade of your land, reducing erosion while adding visual interest. Use stacked stones or wooden planks to create tiers, and fill each level with compost-rich soil.
Plant climbing vegetables like pole beans or cucumbers to take advantage of the vertical space. The spiral shape also creates microclimates, allowing you to grow a wider variety of plants in one bed.
If you’re working with a corner space, rectangular raised mounds are your best bet. These can be built against a fence or wall, using bricks, cinder blocks, or wooden planks for support. Aim for a depth of 18-24 inches to accommodate deep-rooted plants like tomatoes or peppers.
Add a layer of hardware cloth at the bottom to deter burrowing pests. For a low-maintenance option, plant drought-tolerant herbs like rosemary or lavender along the edges.
The keyhole-shaped mound is perfect for those who love permaculture principles. This design features a deeper center where you can bury compost or manure, creating a self-fertilizing system. The outer edges slope gently, making it easy to access plants without compacting the soil.
Fill the center with well-rotted manure or leaf mold, then layer the outer edges with a mix of topsoil and sand. This layout works beautifully for root vegetables like carrots or beets, as the loose soil prevents forking.
Lastly, don’t overlook corner layouts for urban gardens. These can be as simple as a small mound tucked into a tight space, using wooden planks or metal edging to define the shape. Keep the depth between 10-16 inches to save
How to build a mound garden bed: step-by-step soil mixing guide
A mound garden bed thrives on the right soil mix—one that balances drainage, fertility, and root aeration. Unlike traditional beds, mounds warm up faster in spring and drain excess water, making them ideal for heavy clay soils or urban gardening.
The key? Layering organic matter strategically to create a nutrient-rich, well-aerated foundation for your plants. Whether you're growing vegetables, herbs, or flowers, this guide ensures your mound bed sets roots for success.
Start with a base layer of native soil (if workable) or remove the topsoil entirely for better control. For clay-heavy soils, mix in coarse sand or perlite to break up compaction. This layer should be about 6-12 inches deep, depending on your mound height.
Think of it as the "skeleton" of your bed—it sets the stage for everything above. The goal here is to create a loose, crumbly texture that roots can easily penetrate, while also preventing water from pooling at the base.
The organic matter layer is where the magic happens. Aim for a 50% compost and 30% peat moss (or coconut coir for sustainability) blend, with 20% perlite to keep things fluffy. This mix improves water retention while preventing compaction.
For heavy clay soils, swap perlite for vermiculite—it holds moisture better without suffocating roots. Pro tip: Add a handful of worm castings to this layer for an instant boost of beneficial microbes. These tiny helpers break down organic matter faster, giving your plants a head start.
Top off your mound with a 2-3 inch layer of high-quality garden soil blended with 10% worm castings. This final layer is where your plants will root, so don’t skimp on nutrients.
For vegetables like tomatoes or peppers, add a tablespoon of bone meal to encourage strong root and fruit development. If your soil tests acidic (pH < 6.5), sprinkle in 1 cup of lime per 10 square feet to sweeten the mix.
Test your soil first—this small step can mean the difference between thriving plants and struggling ones.
After layering, mulch generously with straw or wood chips to lock in moisture and suppress weeds. Mulch also regulates soil temperature, keeping roots cool in summer and insulated in winter. For edible plants, avoid dyed mulches—they