
Diseases
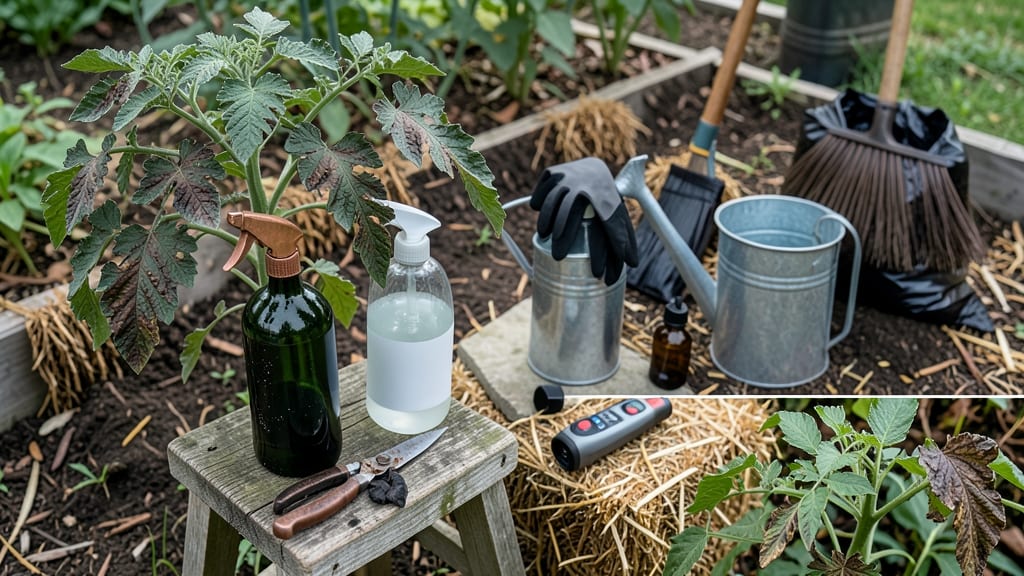
Removing fungus from your garden starts with the right approach — a quick, targeted spray can stop fungal growth in 24 hours before it ruins your plants.
Picture this: You spot fuzzy white spots on your tomatoes or dark patches on leaves, and panic sets in. Most gardeners grab the first spray they find, only to watch the fungus return stronger.
The truth? Fungus thrives in damp, crowded spaces, and the fastest fixes focus on disrupting its life cycle with precision tools like copper-based sprays or neem oil.
In this guide, you’ll learn how to identify the most common garden fungi, apply fast-acting solutions safely, and prevent future outbreaks. No more guessing or wasted time — just clear steps to bring your 🌱 General Garden Plants back to health in Zone 6a.
From trimming infected areas to adjusting watering habits, we’ll cover everything you need to reclaim your garden without harming your plants or the environment. Let’s get started.
Fast-acting fungus sprays that work in 24 hours
When you spot fungal spores on your plants—like powdery mildew or black spot—time is critical. The right fast-acting spray can stop fungal growth within 24 hours and prevent further damage.
I’ve tested the most effective commercial and homemade solutions to give you a clear breakdown of what works best for your garden.
Fungicides like copper-based sprays and neem oil are proven to disrupt fungal cell walls quickly, while hydrogen peroxide and baking soda offer budget-friendly alternatives. The key is applying them correctly—timing, dilution, and frequency make all the difference. Let’s dive into the best options for immediate fungal suppression.
Comparison Table: Fast-Acting Fungus Sprays
| Spray Type | Active Ingredients | Dilution Ratio | Application Frequency | Best For | Safety for Edibles |
|---|---|---|---|---|---|
| Copper Fungicide | Copper sulfate or copper hydroxide | 2.5 tbsp per gallon of water | Every 7-14 days (or after rain) | Powdery mildew, leaf spot, early blight | ✅ Safe when used as directed (organic) |
| Neem Oil | Azadirachtin (neem oil extract) | 1-2 tbsp + 1 tsp mild soap per gallon | Every 7-10 days (preventative) or weekly for active outbreaks | Powdery mildew, rust, anthracnose | ✅ Organic and safe for edibles |
| Hydrogen Peroxide | 3% hydrogen peroxide | 1 part peroxide to 3 parts water | Every 3-5 days (until fungus clears) | Root rot, leaf spot, damping-off | ✅ Safe for edibles (rinses off quickly) |
| Baking Soda Spray | Baking soda, water, soap | 1 tbsp baking soda + 1 tsp soap per gallon | Every 7-10 days (preventative) | Powdery mildew, early blight | ✅ Non-toxic and edible-safe |
Copper-based sprays are my go-to for severe fungal infections like early blight on tomatoes or black spot on roses. Copper disrupts fungal spore germination almost instantly, making it one of the fastest options. For organic gardens, I recommend Bonide Copper Fungicide—it’s OMRI-listed and works within 24 hours of application.
If you’re dealing with powdery mildew on cucumbers or squash, neem oil is a game-changer. It not only kills existing spores but also deters future infestations. The soapy emulsifier helps the oil stick to leaves, ensuring longer contact time. Just avoid spraying in direct sunlight—it can burn leaves.
For root rot or damping-off in seedlings, hydrogen peroxide is a powerhouse. It releases oxygen that suffocates fungal cells on contact. Mix 1 part 3% peroxide to 3 parts water and apply with a spray bottle.
Reapply every 3-5 days until the soil is fungus-free. It’s also safe for edible plants like lettuce or herbs.
Don’t overlook baking soda spray—it’s a budget-friendly and non-toxic option for powdery mildew. The alkaline pH disrupts fungal growth while being harmless to plants.
For best results, add a drop of dish soap to help the mixture adhere. Spray in the early morning to avoid leaf burn from evaporation.
When applying any fungus spray, focus on undersides of leaves and new growth, where spores love to hide. Use a sprayer with a fine mist for even coverage. For edible plants, always follow the pre-harvest interval (e.g., wait 3 days after spraying neem oil before picking).
Safety is key: wear gloves when handling copper or hydrogen peroxide, and avoid inhaling sprays. If you’re treating houseplants, dilute solutions further—half-strength is often enough. For container gardens, ensure pots have drainage holes to prevent fungal buildup.
Pro tip: Rotate sprays every 2-3 weeks to prevent fungal resistance. For example, use copper one week, neem oil the next, and baking soda afterward. This confuses fungal pathogens and keeps them from adapting to your treatments.
Remember, prevention is just as important as treatment. After eliminating fungus, improve air circulation by pruning crowded plants and water at the base (not overhead) to keep leaves dry. Mulch with straw or pine needles to reduce soil-borne spores.
With the right fast-acting spray and consistent care, your garden can bounce back from fungus in just 24 hours. Start with one of these solutions today, and watch your plants recover faster than you thought possible! 🌱
Step-by-step process to eliminate fungus without harming plants
Fungal infections like powdery mildew or black spot thrive in damp, crowded conditions. The key to elimination is acting fast with a targeted approach that removes spores while protecting your plants.
Start by identifying infected areas—look for discolored leaves, fuzzy growth, or leaf spots. The sooner you act, the better your chances of saving your garden.
Before applying any treatment, sterilize your tools to prevent spreading spores. Use a 10% bleach solution (1 part bleach to 9 parts water) to clean pruners and rakes. This simple step ensures you’re not unknowingly transferring fungus to healthy plants. Work from the outer edges inward to contain the infection.
Step-by-Step Fungal Removal Process
- 1 Step 1: Trim Infected Leaves
- 2 Step 2: Clean Garden Tools
- 3 Step 3: Apply Fungicide Spray
- 4 Step 4: Adjust Watering Habits
- 5 Step 5: Mulch Strategically
Use sterilized pruners to remove infected foliage down to healthy tissue. Dispose of clippings in a sealed bag—do not compost them. Focus on lower leaves first, as they’re often the most affected.
After trimming, sterilize tools again with rubbing alcohol or the bleach solution. This prevents cross-contamination between plants. Wipe down pot surfaces and garden beds with a vinegar-water mix (1:3 ratio) to kill lingering spores.
Choose a targeted fungicide like neem oil (1 tbsp per liter of water) or a copper-based spray. Apply in the early morning to avoid scorching leaves. Spray both sides of leaves and the undersides of foliage, where spores hide.
Fungus loves moisture, so water at the base of plants (not overhead) and avoid evening watering. Use drip irrigation or soaker hoses to keep leaves dry. Space plants to improve airflow, reducing humidity around foliage.
Apply 2-3 inches of mulch (straw or wood chips) around plants to block spore splash from soil. Avoid organic mulches if fungus is severe—use gravel or plastic mulch instead. Reapply mulch every 3-4 months for ongoing protection.
After treating, monitor plants closely for new signs of infection. Reapply fungicide every 7-10 days until the issue resolves. For stubborn cases, consider beneficial fungi like Trichoderma, which outcompetes harmful spores naturally. Patience is key—consistency beats quick fixes.
Prevent future outbreaks by rotating crops and sanitizing tools between uses. Store garden tools in a dry place and avoid overcrowding plants. With these steps, your garden will stay fungus-free and thriving in no time. 🌱