
How To
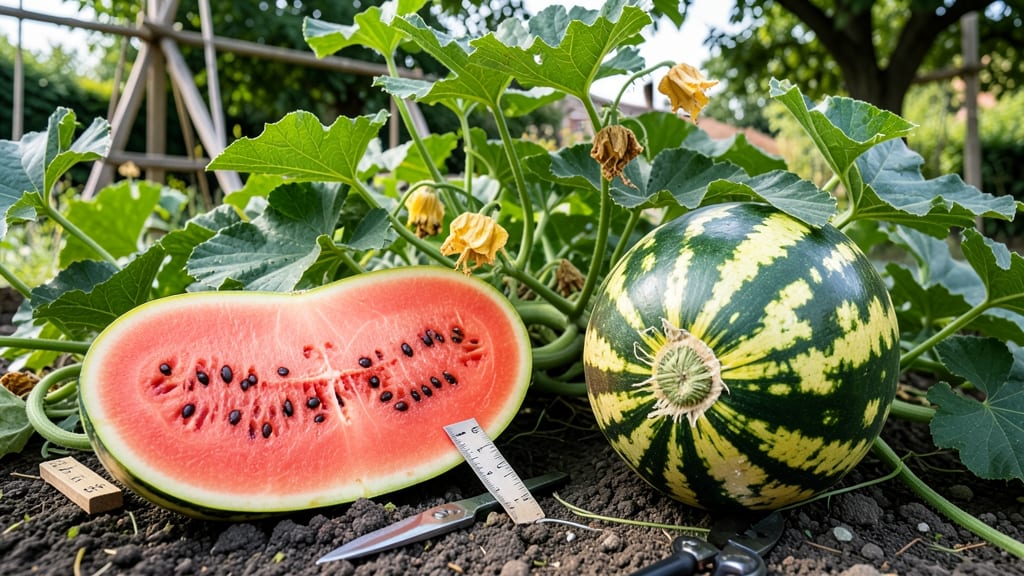
Knowing when to pick watermelon from your garden means spotting five foolproof ripeness signs—and avoiding the heartbreak of a rock-hard slice.
There’s nothing worse than slicing into a watermelon only to find it’s still rock-hard inside—yet knowing the perfect moment to harvest can turn your garden into a sweet, juicy goldmine. 🍉 The key? Watching for the right mix of color, texture, and even the sound of a gentle thump.
Most gardeners focus on the rind or stem, but the field spot (that creamy patch where the melon rested on the ground) is the real game-changer. A deep yellow or orange spot signals sweetness, while a pale or uneven one means wait a few more days.
Below, I’ll break down every clue—from the tendril test to the thump trick—so you never miss the ideal harvest window again, no matter your USDA zone or variety.

5 Visual and physical signs your watermelon is ripe and ready to pick
Harvesting a watermelon at the perfect moment ensures maximum sweetness and juiciness. Overlooking ripeness cues often leads to underripe, bland fruit or overripe, mushy melons.
As a gardener who's spent years perfecting my watermelon harvest timing, I’ve learned to trust these five foolproof signs—each one a clear signal from the plant itself.
The key lies in combining visual clues with physical tests. A single indicator might not guarantee ripeness, but when three or more signs align, you’re ready to celebrate with a crisp, flavorful slice. Let’s break down each method so you can confidently pick your melons at their peak.
- 1. Rind Color Change: Deep, consistent hue with no green stripes near the field spot.
- 2. Field Spot Transformation: Creamy or buttery yellow/orange at the blossom end (opposite stem).
- 3. Tendril Drying: The small curly tendril nearest the stem turns brown and crispy.
- 4. Thump Test: Hollow sound when tapped—like knocking on a wooden door.
- 5. Stem Separation: Stem twists and snaps cleanly when bent (not pulled).
The rind color is your first clue. A ripe watermelon develops a deep, matte finish—no glossy sheen or green streaks. Varieties like Crimson Sweet turn a rich crimson, while Charleston Gray develops a dull gray-green.
Pro tip: Run your thumb over the rind—if it feels slightly rough or waxy, it’s ready.
The field spot (the yellow patch where the melon sat on the ground) is a game-changer. When it turns from white to creamy yellow or orange, sugar production peaks.
I’ve seen gardeners overlook this sign, only to harvest melons that were still hard on the inside. Always check this spot—it’s nature’s ripeness stamp.
Don’t ignore the tendrils—those tiny, curly vines near the stem. A ripe watermelon’s tendril will dry out and turn brown, almost like a crisp autumn leaf.
This happens because the melon is pulling nutrients from the vine to mature. If the tendril is still green, give it another 5-7 days.
The thump test is my favorite because it’s instant feedback. Hold the melon with one hand and thump it firmly with the other. A ripe watermelon sounds hollow and deep, like knocking on a wooden door.
If it sounds dull or flat, it’s not ready. This test works best when the melon is cool to the touch, so harvest in the morning.
Finally, the stem test is the ultimate confirmation. Grasp the stem between your thumbs and forefingers, then twist gently. If it snaps cleanly (not pulls away), the melon is fully ripe.
A stubborn stem means it’s not ready—wait 2-3 more days. This trick saves me from overripe melons that split or develop soft spots.
Regional climate plays a role, too. In hotter zones (USDA 9-10), watermelons ripen faster—sometimes in just 60 days. In cooler areas (USDA 6-8), they may need up to 90 days.
Always adjust your harvest timeline based on your local growing season. For example, Sugar Baby varieties mature quicker than Charleston Gray.
One common mistake? Picking based on size alone. A watermelon can be large but still unripe inside. Always combine three signs before harvesting. I’ve learned this the hard way—overripe melons have a fermented sweetness that’s far from ideal.
Trust the plant’s natural cues, not just your calendar.
Now that you’ve mastered these signs, your garden is one step closer to watermelon perfection. Next time you’re eyeing those plump melons, grab a sharp knife, check these five clues, and enjoy the sweetest harvest of the season. 🌱
Watermelon ripeness by variety: what to watch for in seedless vs. seeded types
Not all watermelons ripen the same way—seedless varieties like Crimson Sweet often mature faster than traditional seeded types like Charleston Gray. These differences mean you’ll need to adjust your harvesting strategy based on what’s growing in your garden.
While both types share core ripeness cues, seedless melons sometimes show softer visual signals that can trick even experienced gardeners.
For example, seedless watermelons often develop a lighter rind color at maturity compared to their seeded counterparts, which can make them appear underripe if you’re not paying close attention.
Meanwhile, seeded varieties tend to hold their deep green hues longer, requiring a more thorough check of the field spot and tendril dryness. Let’s break down the key differences so you never miss the perfect harvest window.
| Ripeness Cue | Seedless Varieties (e.g., Crimson Sweet, Sugar Baby) | Seeded Varieties (e.g., Charleston Gray, Jubilee) |
|---|---|---|
| Rind Color | Lighter, creamy yellow or pale green (not bright green) | Deep, consistent green (no stripes or splotches) |
| Field Spot | Turns creamy yellow (not white or dull) | Becomes yellow-brown or tan |
| Tendril Dryness | Nearest tendril turns brown and crispy (may dry faster) | Tendril browns but stays firm longer |
| Stem Separation | Stem pulls away easily (less fibrous) | Stem snaps cleanly when twisted |
| Thump Test | Sounds dull and hollow (softer rind) | Sounds deep and resonant (thicker rind) |
| Size Maturity | Reaches 70-80% of expected weight faster | Often heavier at full ripeness |
Seedless watermelons like Sugar Baby or Seedsless Honey Dew often ripen in 60-70 days, while seeded varieties like Charleston Gray can take up to 90 days. This means seedless types may show ripeness cues earlier, but their softer rinds can make them feel underripe if you rely solely on touch. Always double-check the field spot and tendril—these are the most reliable indicators for both types.
One critical mistake gardeners make is assuming all watermelons follow the same timeline. Seedless varieties often overripe quickly once they hit peak ripeness, so don’t wait too long after spotting the first signs.
For seeded types, patience pays off—they can stay firm longer but may develop a grainy texture if left on the vine past their prime. Harvest in the morning for the best flavor, regardless of variety.
If you’re growing both types in your garden, label your plants and monitor them separately. Seedless watermelons may need harvesting 5-7 days earlier than seeded ones, even if they’re side by side.
Pay extra attention to climate conditions—hotter summers can speed up ripening in seedless types, while cooler weather may delay it in both. Adjust your watering slightly if you notice uneven ripening across varieties.
Pro tip: Weigh your watermelons as they near maturity. Seedless varieties often reach 8-12 pounds at peak ripeness, while seeded types can grow to 20 pounds or more.
Combine this with the thump test and field spot for foolproof results. With these variety-specific cues, you’ll never guess again—just slice and enjoy that perfectly ripe watermelon! 🍉