
Vegetables
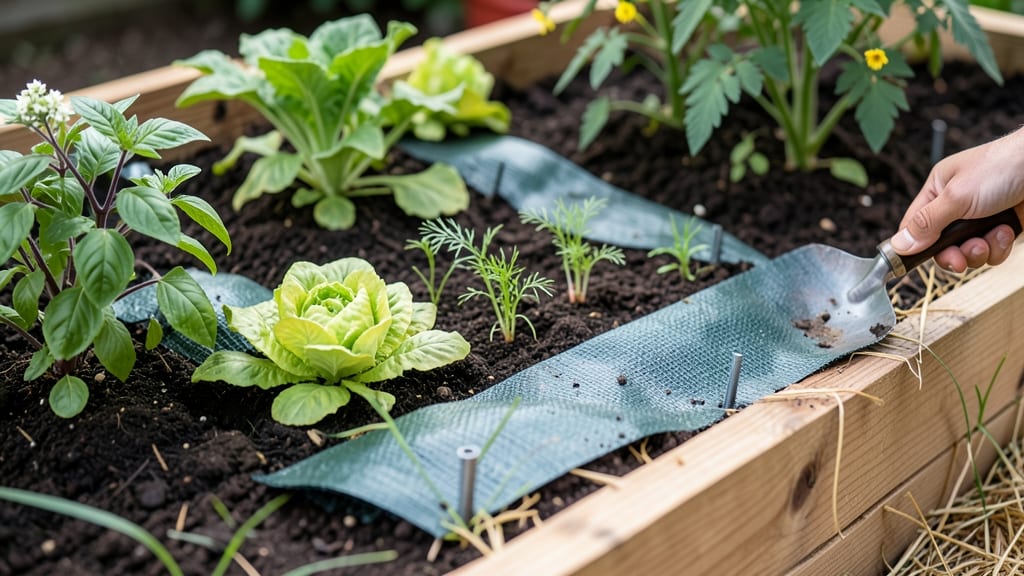
A weed guard for gardens is the secret weapon you didn’t know you needed to reclaim your time, your soil, and your sanity from those relentless weeds.
Picture this: you’re knee-deep in your garden, only to realize half your effort is going toward pulling weeds instead of growing food. That’s where a three-layer weed guard system comes in—it blocks weeds naturally, keeps moisture locked in, and cuts maintenance by 80%.
This isn’t just about throwing down a piece of fabric and calling it a day. The right setup combines physical barriers, organic mulch, and even living ground covers to create an ecosystem that suffocates weeds while feeding your plants. No chemicals, no backbreaking work—just healthier soil and happier veggies.
Below, I’ll break down the exact layers to use, how to install them like a pro, and the best organic materials to keep your garden thriving without the hassle. Let’s make weeding a thing of the past.
How a 3-Layer weed guard system works to eliminate weeds naturally
A 3-layer weed guard system is like building a fortress around your plants—each layer serves a unique purpose to suffocate weeds while nurturing your garden. The magic happens when you combine a physical barrier, mulch layer, and living ground cover to create an ecosystem where weeds can't survive.
This method saves time, eliminates herbicides, and even improves soil health over time.
Weeds thrive by competing for sunlight, water, and nutrients. By blocking their access, you give your plants the upper hand. The first layer acts as a blockade, the second smothers what slips through, and the third outcompetes any remaining intruders.
Together, they create a self-sustaining defense system that requires minimal maintenance after setup.
Here’s how each layer works in harmony to eliminate weeds naturally while keeping your garden thriving:
The first layer—your physical barrier—is the foundation. I recommend using cardboard (unbleached, no glossy coatings) or landscape fabric to block sunlight from reaching weed seeds. Cardboard decomposes over time, adding nutrients to the soil, while fabric lasts longer but may require replacement every 2-3 years.
This layer alone can reduce weed germination by up to 90% if installed correctly.
For the second layer, organic mulch like straw or wood chips creates a suffocating blanket for any weeds that break through the first layer. Straw breaks down faster, enriching the soil, while wood chips last longer and help retain moisture.
A 3-4 inch layer is ideal—thick enough to block light but not so thick it smothers your plants. This layer also regulates soil temperature and reduces evaporation.
The third layer is where the ecosystem truly thrives. Living ground covers like clover or creeping thyme spread quickly, forming a dense mat that outcompetes weeds for sunlight and nutrients. Unlike mulch, these plants actively improve soil health by fixing nitrogen or preventing erosion.
They’re perfect for pathways, borders, or areas where you want a low-maintenance, green carpet instead of bare soil.
One of my favorite combinations is cardboard + straw + clover. The cardboard blocks weeds immediately, the straw smothers what slips through, and the clover takes over long-term, creating a self-sustaining weed-free zone.
Over time, the cardboard decomposes, the straw turns into compost, and the clover adds nitrogen—all while keeping weeds at bay.
This system isn’t just about weed suppression; it’s about building healthy soil. The mulch and ground covers break down into organic matter, improving soil structure and microbial activity. Unlike chemical herbicides, which can harm beneficial organisms, this method nurtures your garden’s ecosystem while keeping weeds under control.
Plus, it’s cost-effective—most materials are inexpensive or even free (like cardboard from deliveries or yard waste).
If you’re worried about aesthetics, don’t be! Modern mulches like dyed wood chips or gravel (for pathways) blend seamlessly with gardens. Living ground covers add texture and color, while landscape fabric can be hidden under mulch.
The key is to choose materials that match your garden’s style while still delivering weed control.
For best results, install your 3-layer weed guard in early spring or late fall, before weeds have a chance to establish. Water the area thoroughly after setup to help the layers settle and begin working together.
With this system, you’ll spend less time pulling weeds and more time enjoying your thriving garden—naturally and effortlessly.
Step-by-step guide to installing a chemical-free weed guard in your garden
A chemical-free weed guard isn’t just a barrier—it’s a game-changer for reducing weeding time by up to 80% while improving soil health. Whether you’re working with raised beds, in-ground plots, or container gardens, the key lies in proper layering.
Skipping steps like weed removal or using the wrong materials can leave gaps for weeds to thrive. Let’s break this down into simple, actionable steps to create a weed-proof foundation for your garden.
Before you start, gather your materials: cardboard (no glossy ink), landscape fabric (biodegradable if possible), mulch (straw, wood chips, or leaves), and compost. The goal is to smother weeds naturally while keeping your plants happy.
This system works best when installed before planting, so plan ahead—especially if you’re prepping for spring vegetables or summer flowers.
⚠️ MANDATORY VISUAL ELEMENT: step-list ⚠️
Step-by-Step Installation Guide
- Step 1: Clear the area of existing weeds and debris. Use a garden fork to loosen soil in in-ground plots or remove old mulch from raised beds.
- Step 2: Lay down a 2-3 inch layer of cardboard (shiny side up) to block light. Overlap edges by 4-6 inches to prevent gaps.
- Step 3: Cover cardboard with landscape fabric (biodegradable preferred). Secure edges with landscape staples or rocks.
- Step 4: Add a 2-3 inch mulch layer (straw or wood chips). For container gardens, use coco coir or shredded leaves.
- Step 5: Plant directly into the mulch or create small holes. Water deeply to settle layers and encourage decomposition.
For raised beds, you can skip the cardboard if the bed is new and weed-free, but always use fabric to prevent soil erosion. In container gardens, opt for lighter mulch like pine needles or grass clippings to avoid weight issues. The key is consistency—thicker layers (3+ inches) last longer and suppress weeds more effectively. Avoid synthetic fabrics, as they don’t decompose and can harm soil microbes over time.
One of the biggest mistakes gardeners make is skipping the cardboard layer, which leaves weeds with enough light to sprout. Another is using treated paper or plastic, which can leach chemicals into the soil.
Always choose untreated, biodegradable materials to keep your garden chemical-free and sustainable. After installation, check for gaps every 2-3 weeks and add fresh mulch as needed to maintain the barrier.
With proper maintenance, your 3-layer weed guard will keep weeds at bay for 1-3 seasons, depending on the materials used. This means less time weeding and more time enjoying your thriving garden—whether it’s tomatoes, herbs, or flowers.
The best part? You’ll also conserve moisture and improve soil structure over time. Happy gardening!